TrueNAS SCALE 版はこちら
TrueNAS SCALE の CUI での固定IPアドレス設定
FreeNAS の CUI で IPアドレスを設定するの画像を TrueNAS 版にしたものです。

The web interface could not be accessed.
Please check network configuration.
TrueNASは初期設定で、DHCPからIPアドレスを取りに行きますが、なんらかの理由で取れなかったり、IPアドレスを固定したい場合、コンソールのCUIから設定することができます。
(もちろんDHCPで取得出来ていてIPアドレスがわかっている場合はWebUIから変更しても構いませんが、WebUIの接続先が結局変わりますし、初期設定時は画面やキーボードもつないでいることと思うので、IPアドレス変更はCUIで済ませてしまった方が手っ取り早い印象です)
IPアドレスを設定したい場合は、
1) Configure Network Interfaces
を実行します。
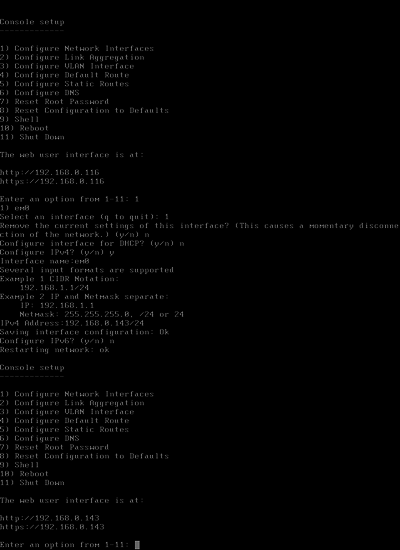
Enter an option from 1-11: 1
1) em0
Select an interface (q to quit): 1
Remove the current settings of this interface? (y/n) n
Configure interface for DHCP? (y/n) n
Configure IPv4? (y/n) y
Interface name: em0[Enter]←空欄で[Enter] でも通るけどWebUIでは必須なので上で表示されている名称でオウム返しで指定しておいた方が吉
Several input formats are supported
Example 1 CIDR Notation:
192.168.1.1/24
Example 2 IP and Netmask separate:
IP: 192.168.1.1
Netmask: 255.255.255.0, /24 or 24
IPv4 Address :192.168.0.143/24 ←/24(=255.255.255.0)ってやらないと、次の行で IPv4 Netmask を設定することになる
Saving interface configuration: Ok
Configure IPv6? (y/n) n
Restarting network: ok
The web user interface is at:
http://192.168.0.143
https://192.168.0.143
と表示されれば成功。
Interface Name はただ[Enter]だと設定されたことにならないので、
em0とかre0とかbge0とか表示されてるのをオウム返しに設定すればいいんじゃないかと思います。
(Web UIだと必ず設定する必要がある)
デフォルトゲートウェイを設定したいときは
4) Configure Default Route
です。Web UIでもいいと思うけど、一応。
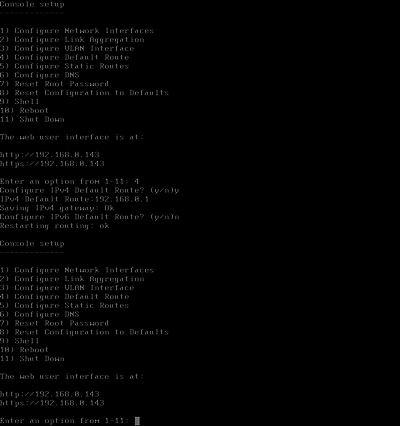
Enter an option from 1-11: 4
Configure IPv4 Default Route? (y/n) y
IPv4 Default Route:192.168.0.1
Saving IPv4 gateway: Ok
Configure IPv6 Deafult Route? (y/n) n
Restarting routing: ok
DNSサーバーの設定もCUIでできる。もちろん、Web UIでもいいと思う。
6) Configure DNS
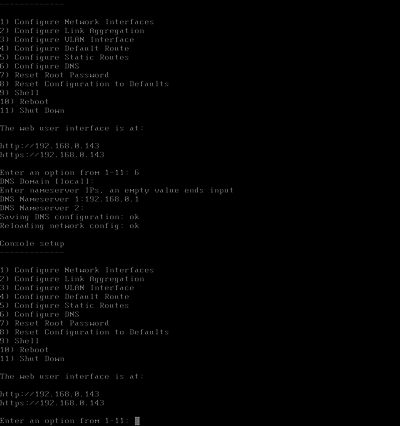
Enter an option from 1-11: 6
DNS Domain [local]:何も入力せず[Enter]
Enter nameserver IPs, an empty value ends input
DNS Nameserver 1:192.168.0.1
DNS Nameserver 2:何も入力せず[Enter]
Saving DNS configuration: ok
Reloading network config: ok
このくらいで十分では。


コメント